
[ad_1]
When printing, surprising challenges could come up that may must be resolved so as to full a profitable print. Typically occasions, the suitable response to a printing concern just isn’t instantly obvious. This information outlines among the commonest points confronted by 3D printing practitioners and highlights steps which may be taken to resolve these points.
Desk of Contents
The information is organized right into a desk with the next format.
| Concern/Title | This highlights the motion of a printer or print end result that’s not optimum or right. That is corresponding to a medical examination the place the physician inquires concerning the signs or conduct the affected person is exhibiting or experiencing whereas being unwell. |
| Instance Picture/Graphic | That is a picture or graphical illustration of the difficulty. |
| Concern Particulars | This supplies further data on the difficulty from actions throughout printing or the outcomes upon completion. |
| Trigger and Urged Options | This lists so as from highest to lowest chance the supply or explanation for the difficulty and prompt options to comply with for concern decision. |
Stage Your Print Mattress
In case you are particularly working into points that relate to having an unlevel printing floor, please check with our Anatomy of a 3D Printer: Mattress Leveling article – it has complete options for any kind of leveling system!
Click on right here: The Anatomy of a 3D Printer: Mattress Leveling

Troubleshooting Information
Not Extruding At The Begin Of The Print
|
Not extruding in the beginning of the print |
|
|
Instance Picture / Graphic |
|
|
Concern Particulars |
Print grooves left in mattress with no filament and/or flaky or intermittent strains of filament on the primary and subsequent layers |
|
Trigger 1 |
Incorrect extruder calibration/offset |
|
Urged Options 1 |
|
|
Trigger 2 |
Clogged extruder/nozzle |
|
Urged Options 2 |
|
Print Not Sticking To Mattress
|
Print not sticking to mattress |
|
|
Instance Picture / Graphic |
|
|
Concern Particulars |
Inadequate mattress adhesion |
|
Trigger 1 |
Mattress just isn’t degree |
|
Urged Options 1 |
|
|
Trigger 2 |
Incorrect nozzle calibration/offset |
|
Urged Options 2 |
|
|
Trigger 3 |
Improper mattress floor or settings for filament |
|
Urged Options 3 |
|

Jammed Nozzle / Clogged Extruder
|
Jammed nozzle/clogged extruder |
|
|
Instance Picture / Graphic |
|
|
Concern Particulars |
Extruder is unable to feed filament by nozzle and is usually accompanied by a grinding or “clicking” sound from the feed motor |
|
Trigger 1 |
Warmth creep for PLA |
|
Urged Options 1 |
|
|
Trigger 2 |
Particle or carbonized filament blocking nozzle |
|
Urged Options 2 |
|


|
Instance Picture / Graphic |
|
|
Concern Particulars |
Edge close to the underside of the print or floor adjoining to the print mattress just isn’t degree or flat |
|
Trigger 1 |
Supplies, e.g. ABS and Nylon could shrink upon cooling and/or curing |
|
Urged Options 1 |
|
|
Trigger 2 |
Design of half has sharp corners or skinny areas |
|
Urged Options 2 |
|

|
Concern/Title |
|
|
Instance Picture / Graphic |
|
|
Concern Particulars |
Layers don’t adhere to beforehand printed layers and pulls from print mattress |
|
Trigger 1 |
Print temperature is about too low |
|
Urged Options 1 |
|
|
Trigger 2 |
An excessive amount of layer cooling throughout and after deposition |
|
Urged Options 2 |
|
|
Trigger 3 |
Ambient air temperature is just too chilly and uneven |
|
Urged Options 3 |
|
|
Trigger 4 |
Printer is printing too quick |
|
Urged Options 4 |
|

|
Concern/Title |
|
|
Instance Picture / Graphic |
|
|
Concern Particulars |
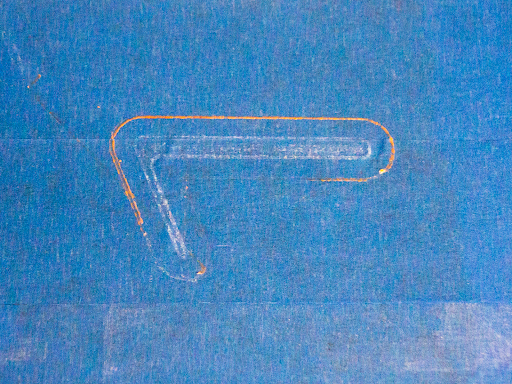
Layers shift within the z-direction as print progresses |
|
Trigger 1 |
Printer is printing too quick |
|
Urged Options 1 |
|
|
Trigger 2 |
There nozzle is getting caught on raised or warped sections of the print |
|
Urged Options 2 |
|
|
Trigger 3 |
There are free pulleys on the x-axis and/or y-axis |
|
Urged Options 3 |
|
|
Trigger 4 |
Belts are skipping enamel on the x-axis and/or y-axis |
|
Urged Options 4 |
|
|
Concern/Title |
|
|
Instance Picture / Graphic |
|
|
Concern Particulars |
Filament within the scorching finish of the extruder continues to ooze out of the nozzle throughout non-print strikes |
|
Trigger 1 |
Sluggish extruder motion between sections of a component or multiple half |
|
Urged Options 1 |
|
|
Trigger 2 |
Size of filament retraction is just too quick |
|
Urged Options 2 |
|
|
Trigger 3 |
You might be printing with PET |
|
Urged Options 3 |
|
|
Trigger 4 |
Printer crosses gaps when transferring from one place to a different |
|
Urged Options 4 |
|

|
Concern/Title |
|
|
Instance Picture / Graphic |
|
|
Concern Particulars |
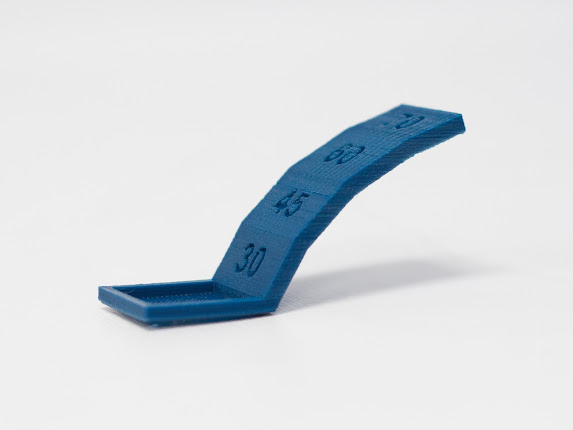
Unsupported or protruding half faces could not print correctly or not print in any respect |
|
Trigger 1 |
Design of mannequin or positioning of half |
|
Urged Options 1 |
|
|
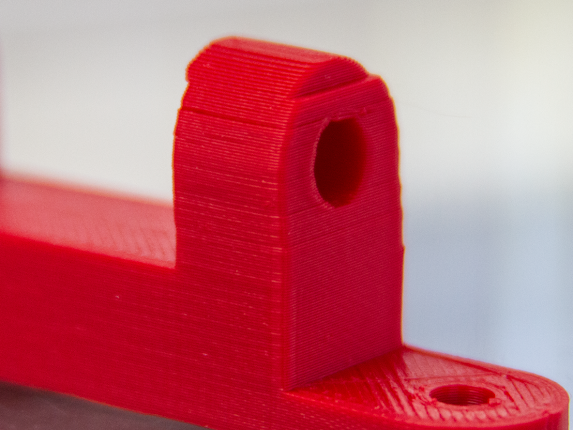
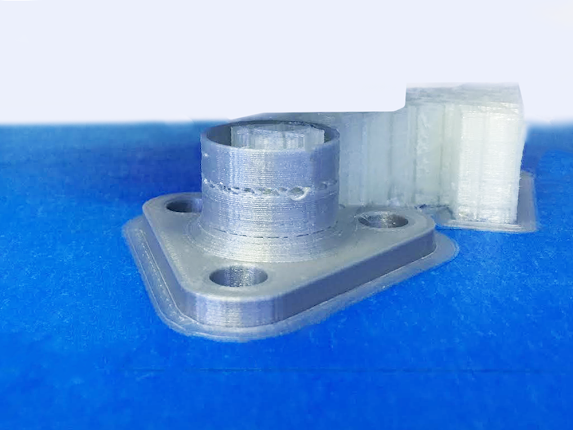
Concern/Title |
|
|
Instance Picture / Graphic |
|
|
Concern Particulars |
Eradicating helps is troublesome on account of fused help materials with the preliminary half layers and sometimes leads to pitted preliminary layers as soon as helps are eliminated |
|
Trigger 1 |
No hole or layer top offset between help layer and preliminary half layer |
|
Urged Options 1 |
|

|
Below extrusion, e.g. not extruding sufficient plastic or inadequate materials |
|
|
Instance Picture / Graphic |
|
|
Concern Particulars |
Below extrusion is recognized by “silky” residue or gaps between extrusion strains or layers |
|
Trigger 1 |
Printer settings for filament dimension is inaccurate |
|
Urged Options 1 |
|
|
Trigger 2 |
Filament extrusion temperature is just too low |
|
Urged Options 3 |
|
|
Trigger 3 |
Nozzle or extruder could also be clogged or not correctly calibrated |
|
Urged Options 3 |
|

|
Grinding filament and/or extruder motor skipping |
|
|
Instance Picture / Graphic |
|
|
Concern Particulars |
Noise from the feed motor makes a grinding or clicking sound |
|
Trigger 1 |
Warmth creep from the extruder that creates a “bulb” on the finish of the filament between the gear and the extruder |
|
Urged Options 1 |
|


|
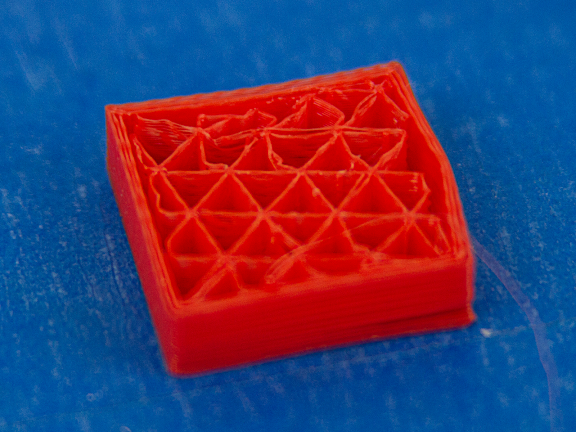
Infill exhibiting on exterior of print |
|
|
Instance Picture / Graphic |
|
|
Concern Particulars |
Infill construction is seen on the highest, backside or sides of a printed half |
|
Trigger 1 |
Infill exhibits on prime or backside surfaces on account of inadequate variety of prime/stable backside layers or incorrect layer speeds |
|
Urged Options 1 |
|
|
Trigger 2 |
Infill exhibits on facet surfaces on account of inadequate variety of perimeters or an excessive amount of infill overlap |
|
Urged Options 2 |
|
[ad_2]
")
